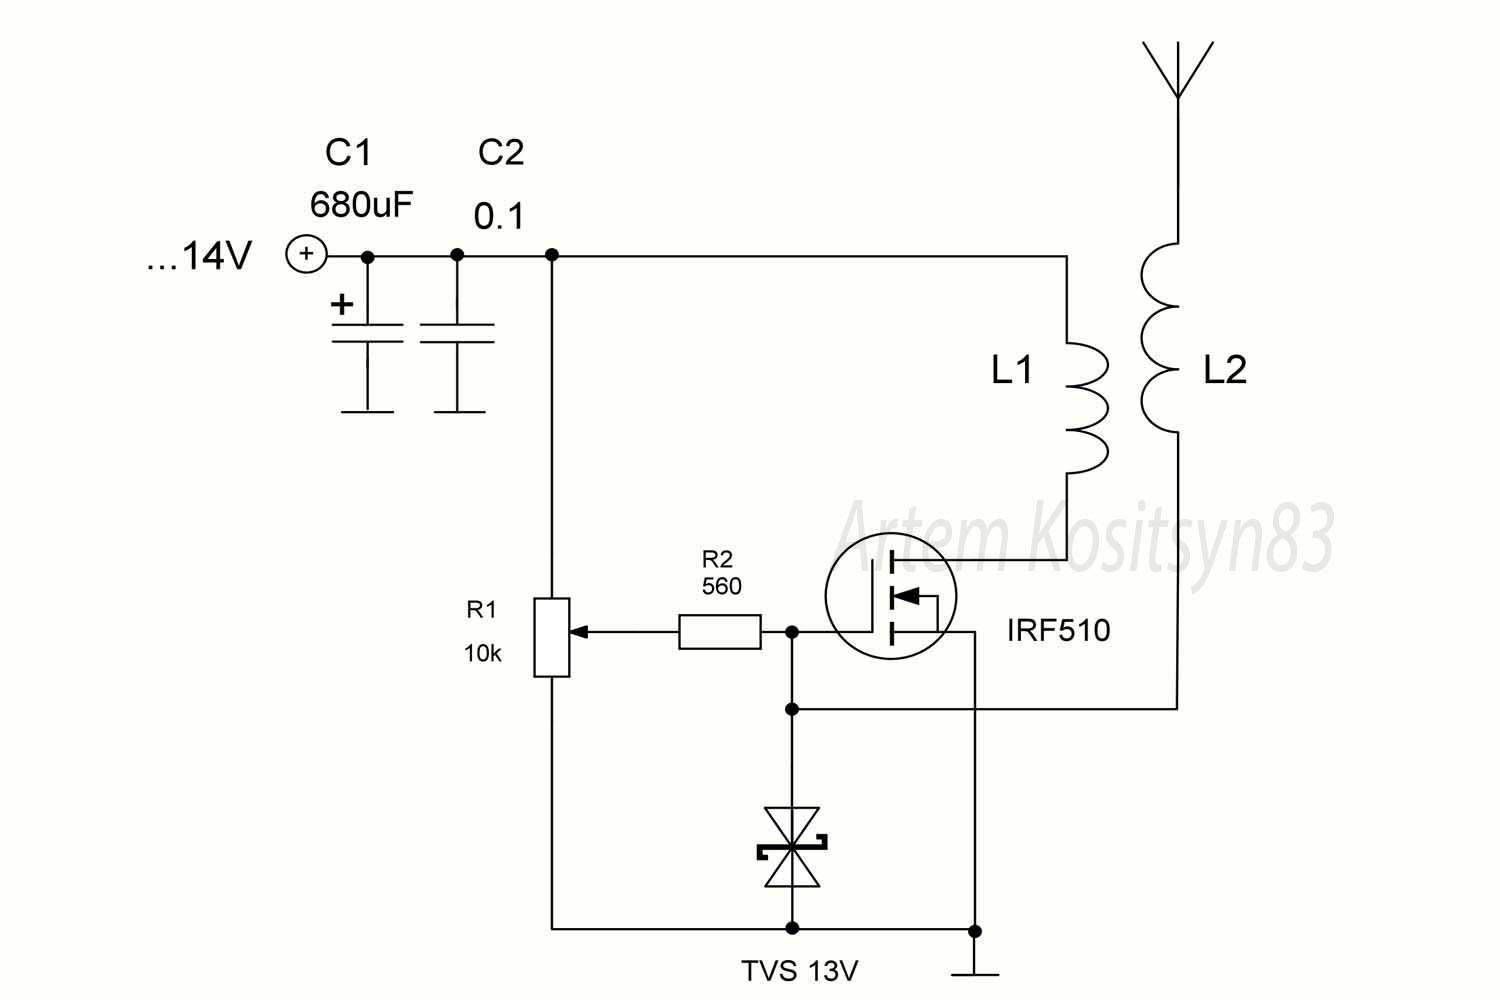
This high-frequency generator can carry out interesting experiments, the generator is called a “Tesla coil”. There are low-frequency Tesla coils, this coil is high-frequency. The generator is made on the IRF510 transistor, with resistor R1 you need to set the bias on the gate of the transistor at which the generator will start working. In this case, you need to monitor the current consumption
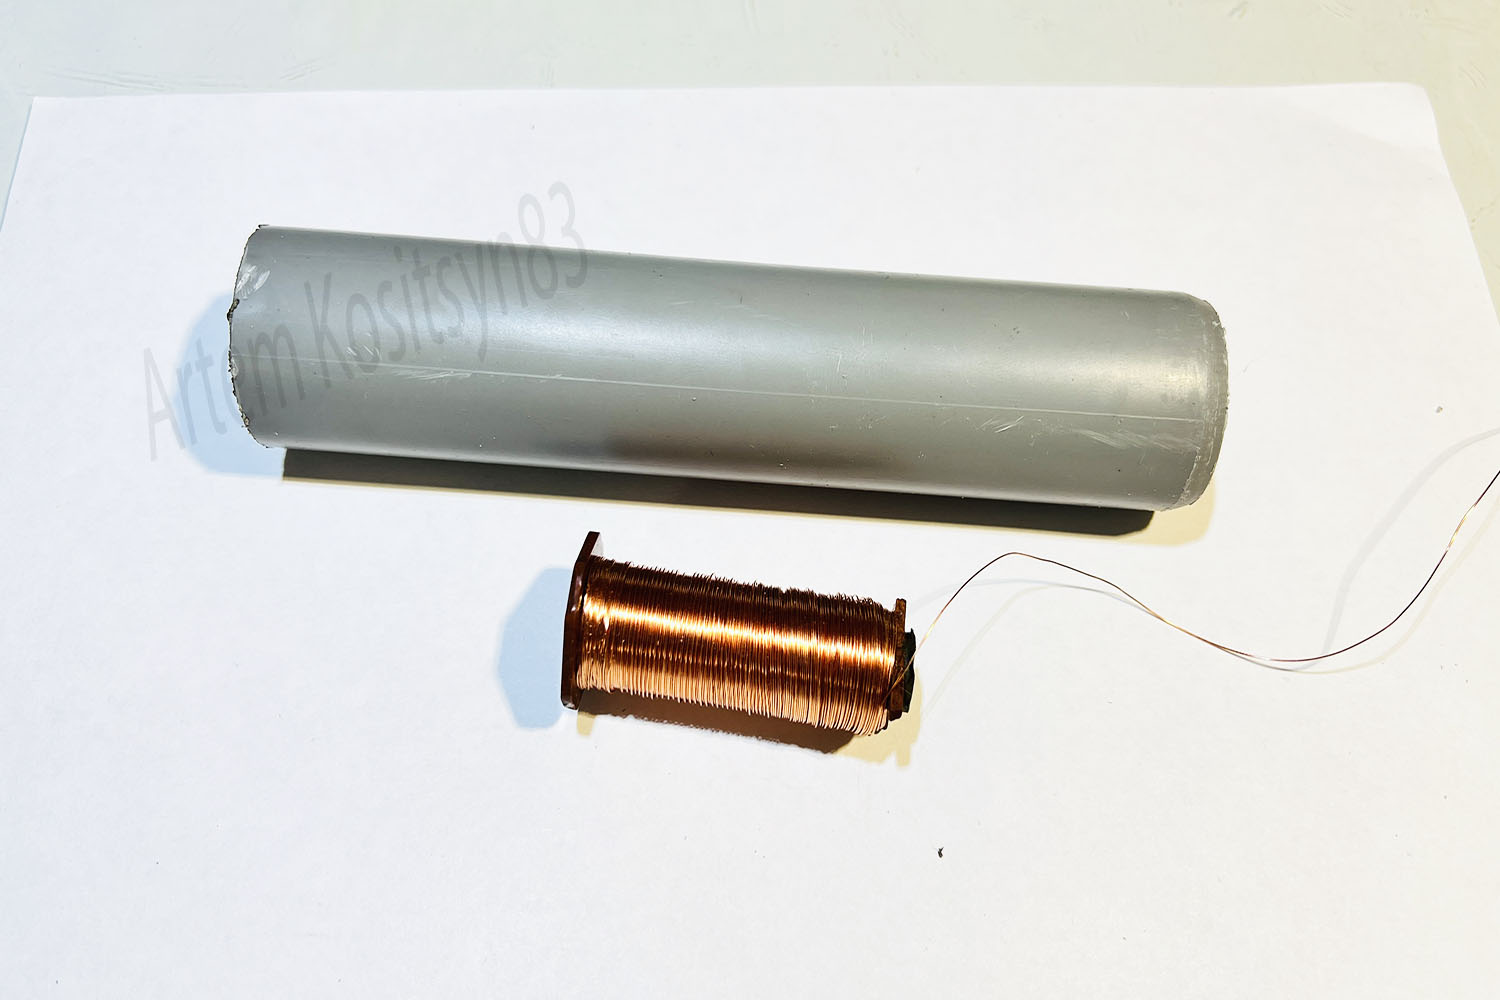
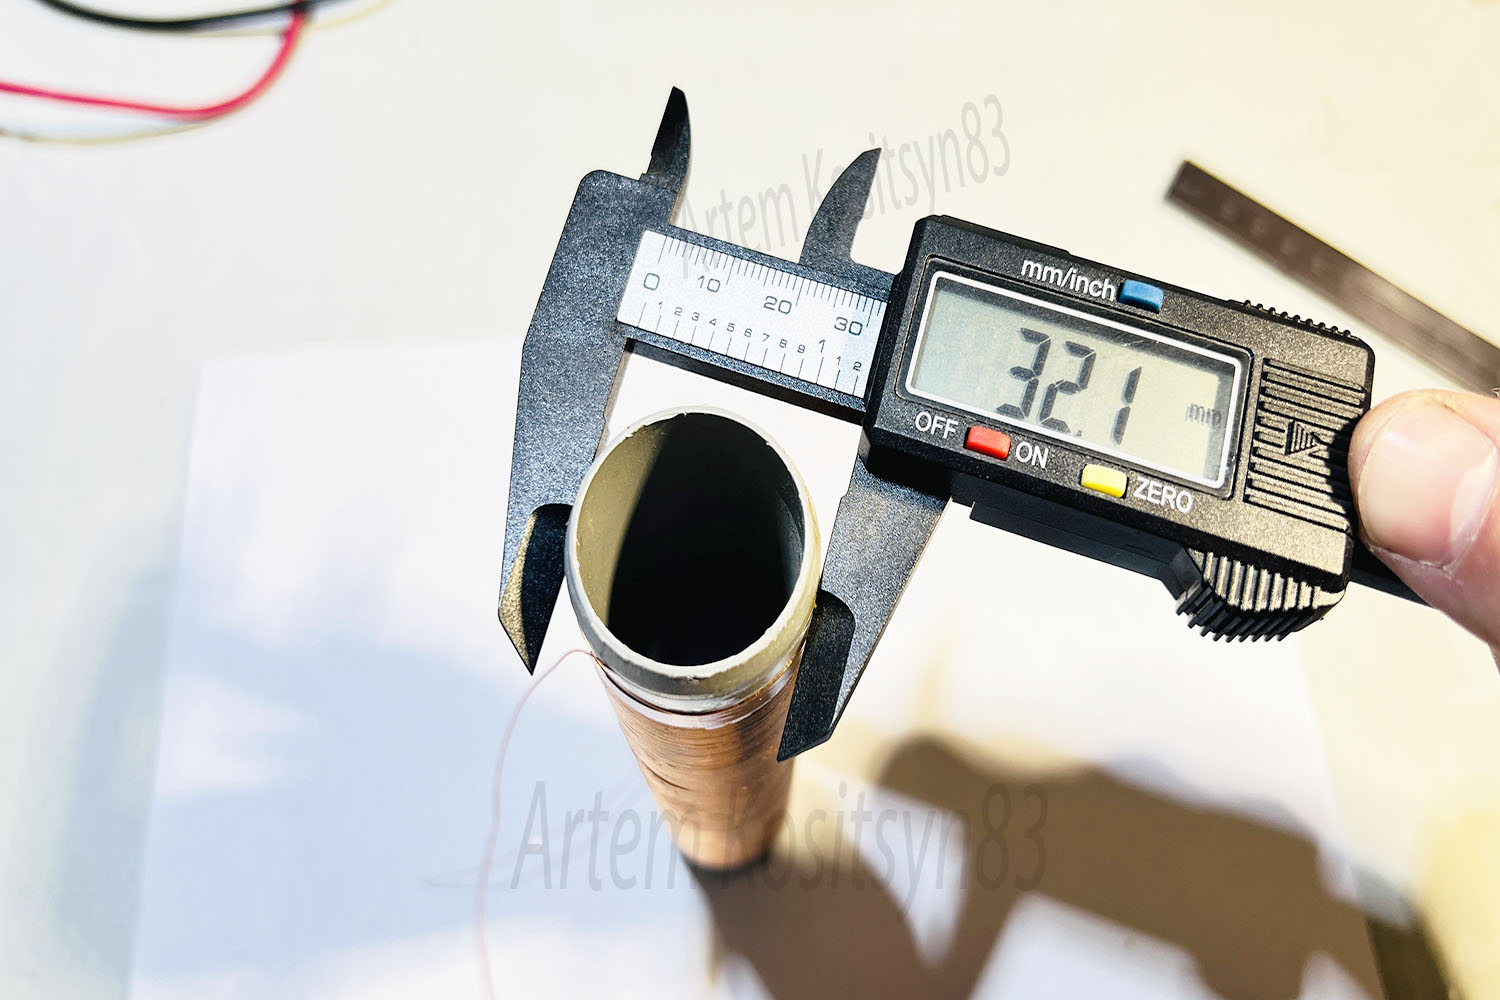
The basis of the generator is the coil L1-L2. I wound the coil on a plastic pipe with a diameter of 32 mm. You can wind the coil with a different diameter. The larger the diameter of the coil, the stronger the electromagnetic field near the coil will be
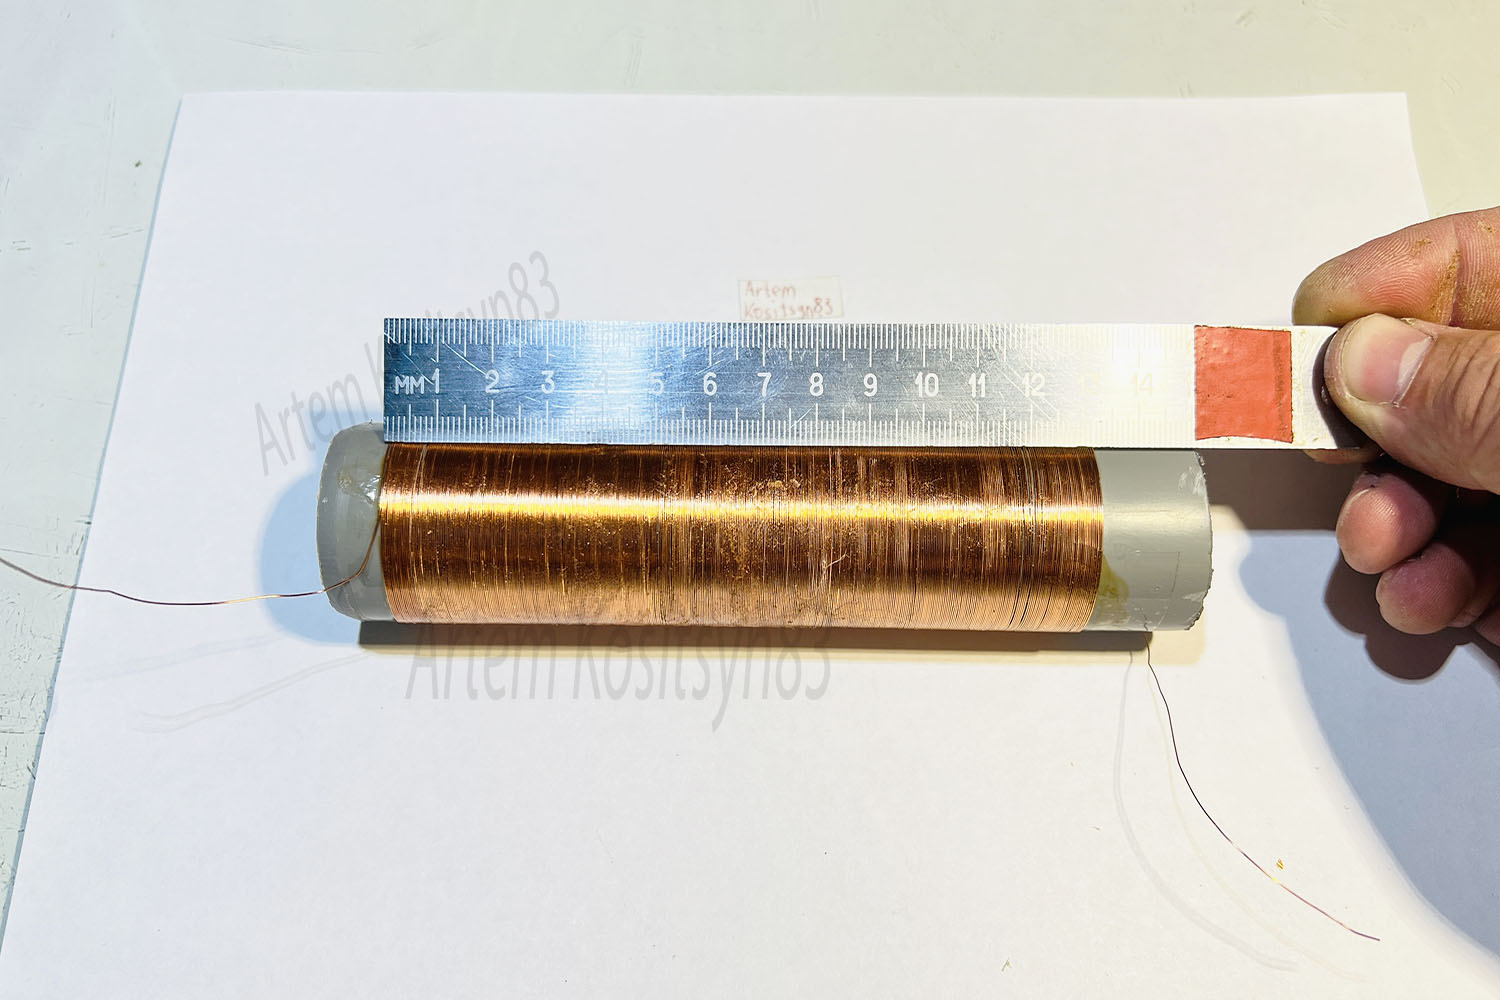
Wire used with a diameter of approximately 0.14mm, winding length 130mm.This is winding L2
Winding L1 is wound on top of L2 and contains 3 turns of wire with a diameter of 0.5-0.6 mm. Wind the winding on a frame that should move along winding L2
The generator is assembled and now it’s time to check it
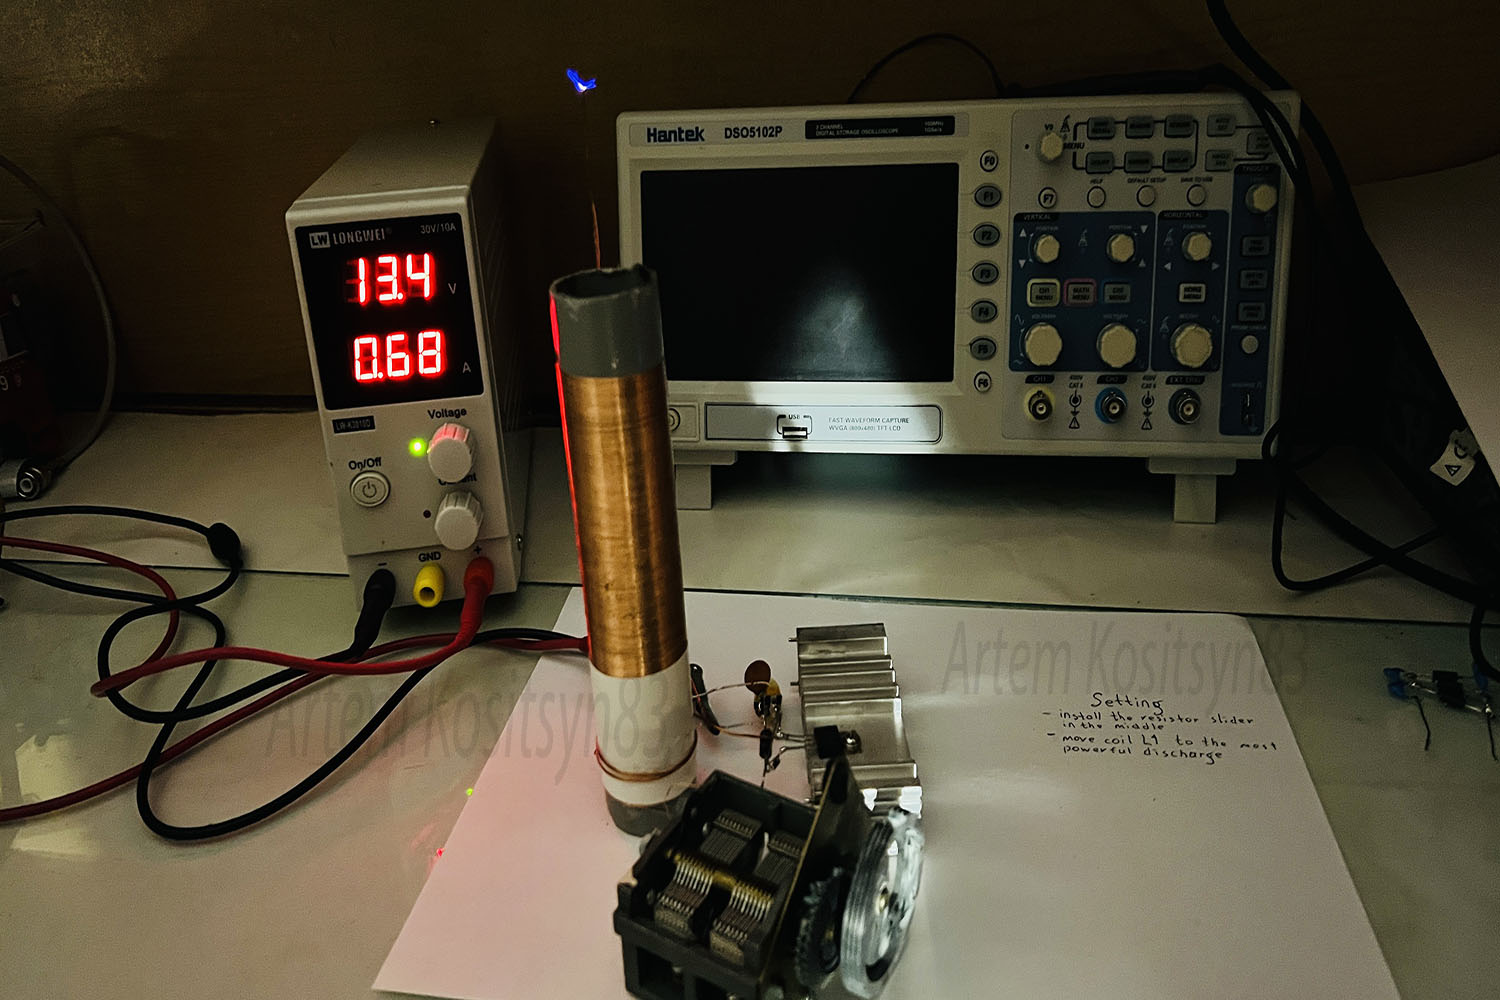
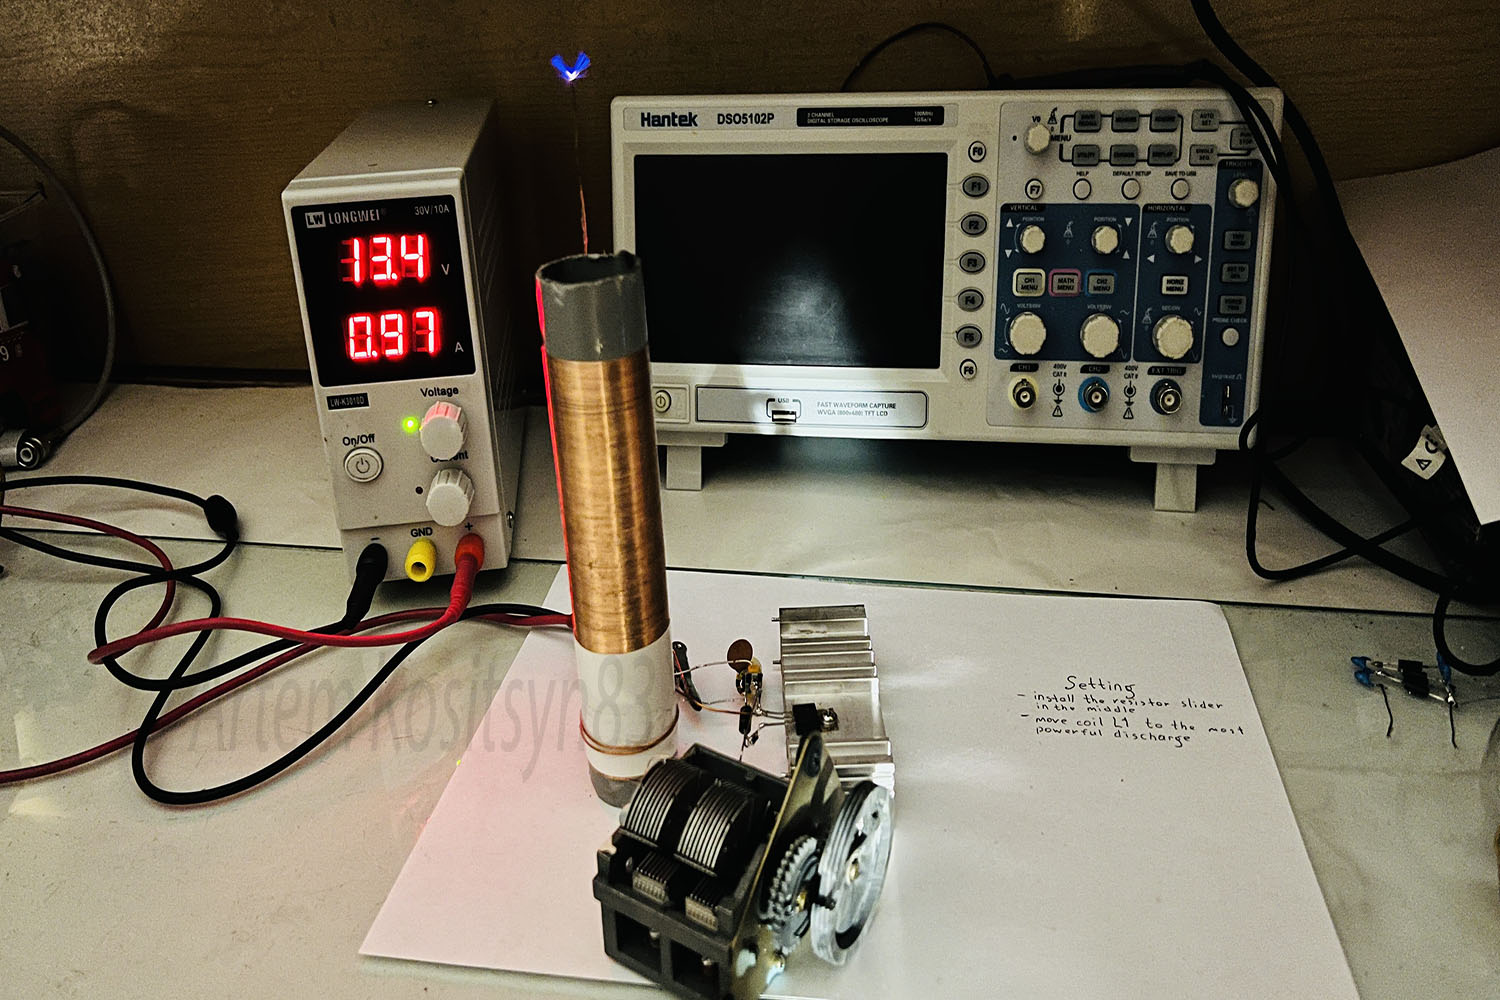
When power is applied, the generator should start working immediately. A discharge approximately 5-10 mm long should emanate from one pin L2, while the current consumption is 700 mA at a voltage of 14 Volts. If the generator does not start, swap the terminals of one of the windings.Move coil L1 until you reach the maximum power of the Tesla coil
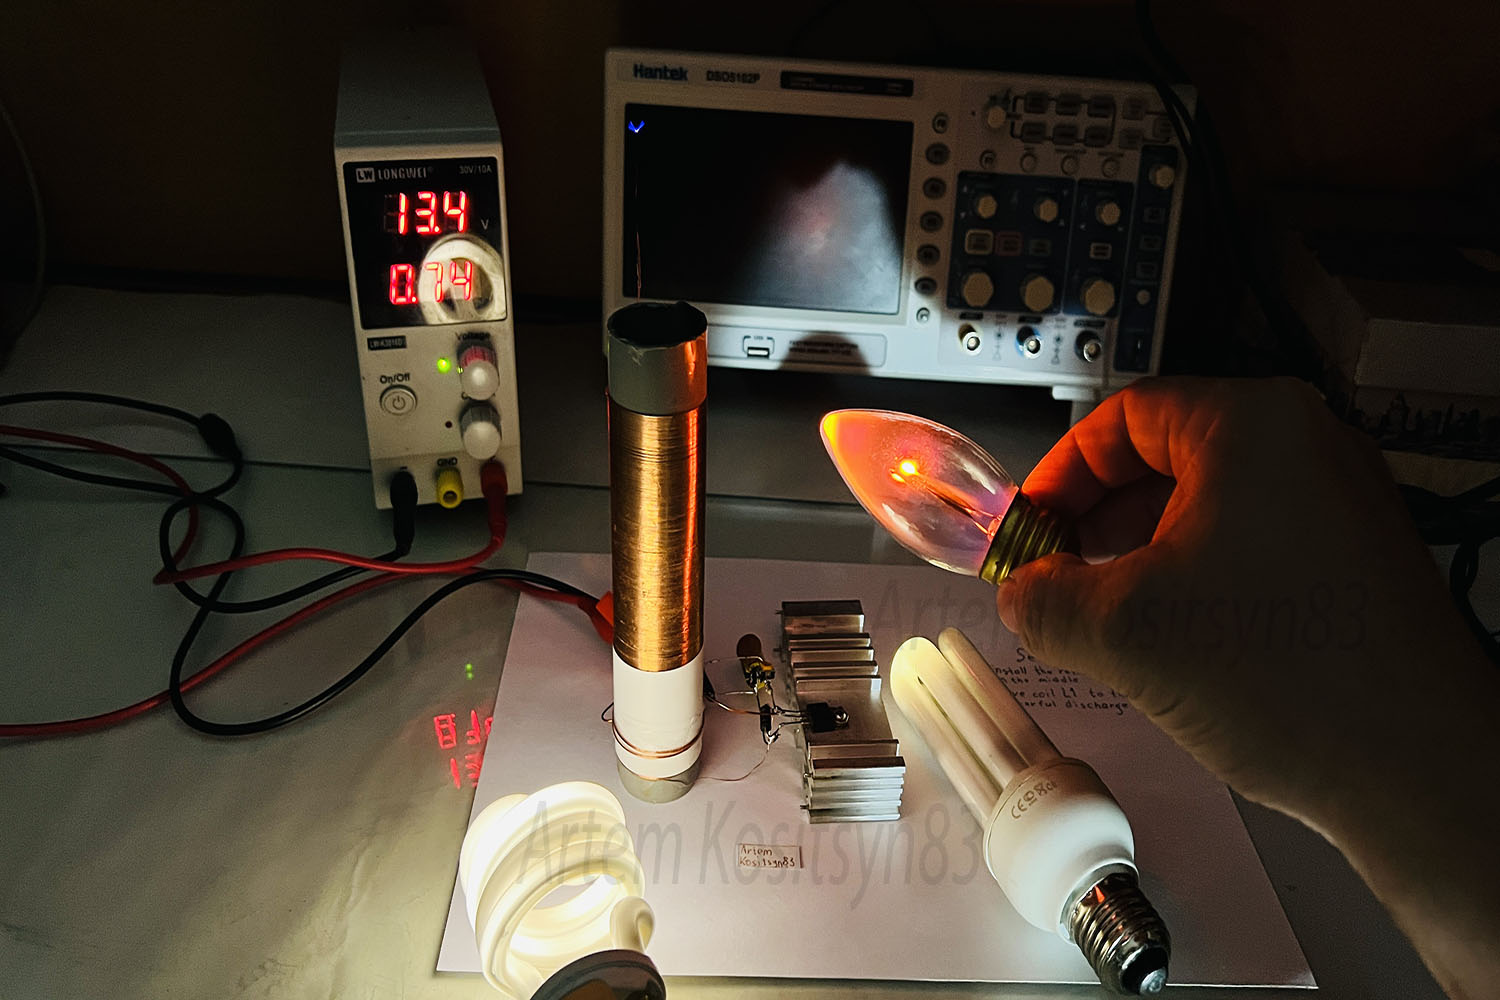
Take a fluorescent lamp or neon lamp and hold it near the coil. The lamps should shine brightly
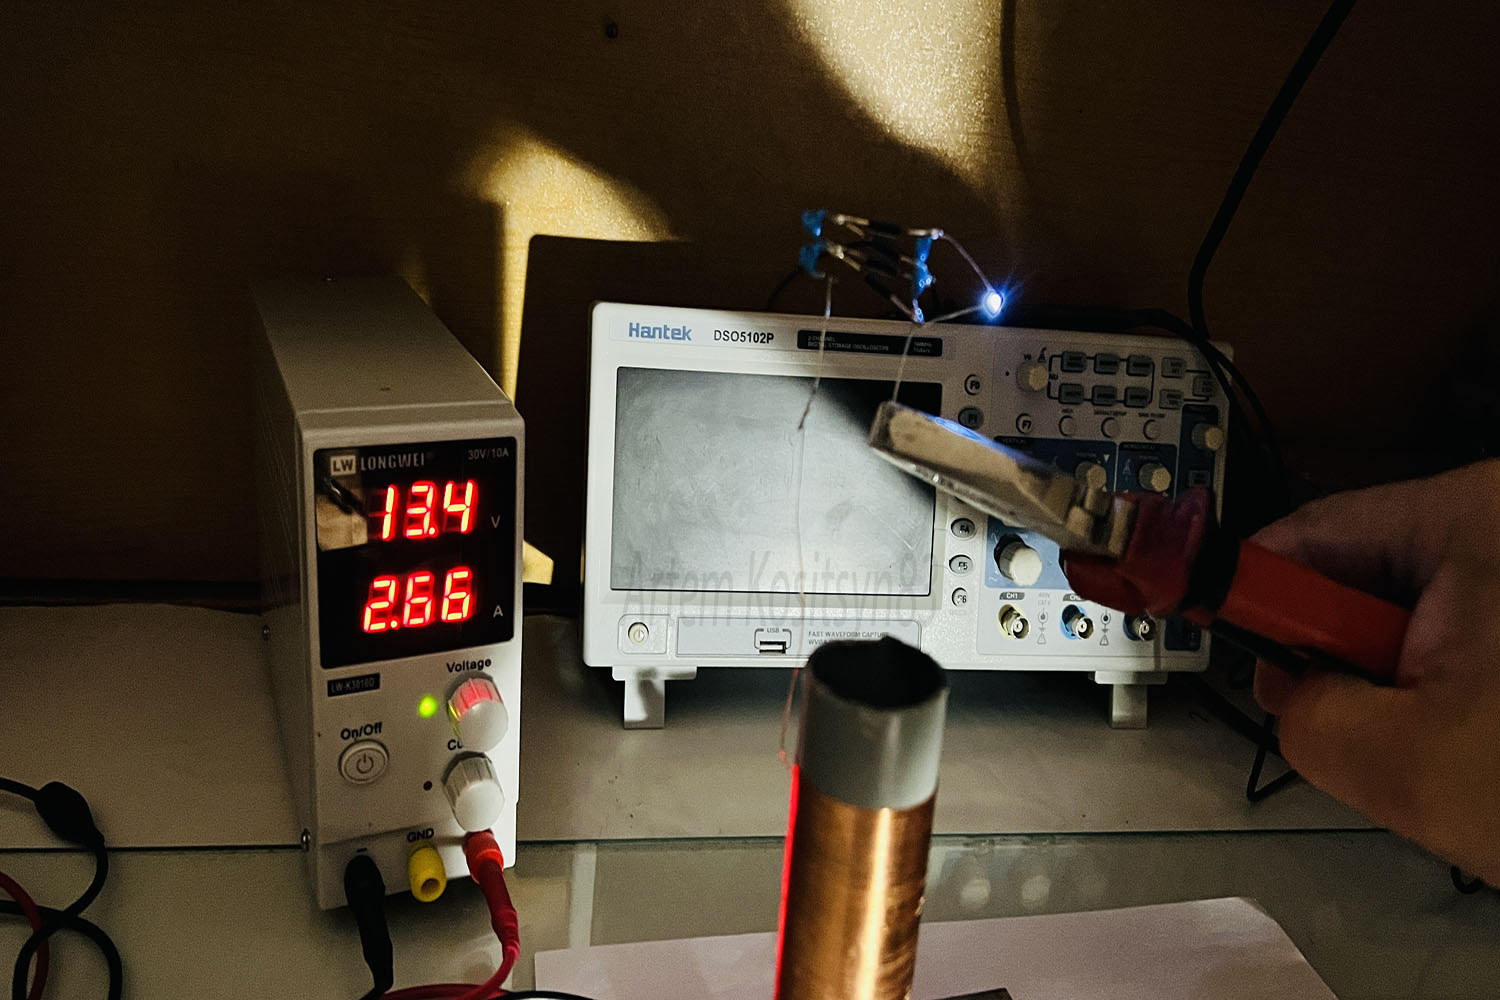
Take a voltage multiplier on four diodes and capacitors. Touch one pin of the multiplier to the terminal of the coil, and take the other pin of the multiplier using an insulated tool. You will see a high-voltage discharge, the current consumption will increase to 2-2.5 Amperes
Take a variable capacitor and connect it to the gap of the L2 coil. The shape of the discharge will begin to change and the current will also change.